
 Botanical
Vegetable Spring Rolls
Vegetable spring rolls enclose a finely cut, relatively dry vegetable filling in crisp wrappers. The filling is cooked before rolling, so the frying stage…
Cantonese-style steamed fish highlights the fish itself with ginger, spring onion and a light soy dressing. Steaming should leave the flesh moist and delicate. The hot-oil finish releases aroma from the fresh garnish without turning it into a heavy fried topping.
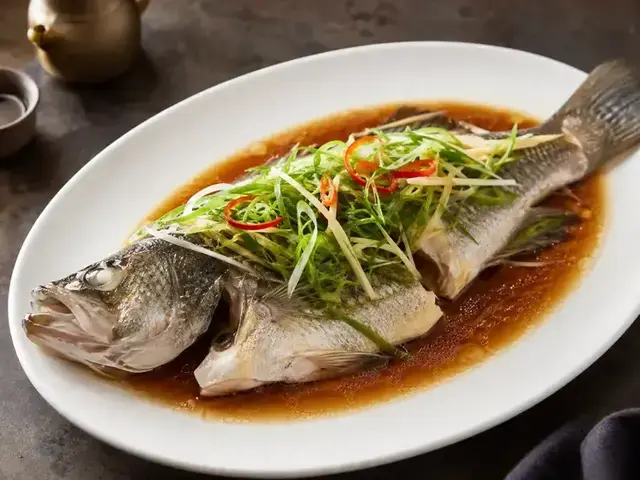
Follow the measured ingredients, numbered method, substitutions, safety notes and cooking mode below.
Use fillet portions of similar thickness and check for pin bones. Cut ginger into fine matchsticks so it flavours the fish without large fibrous bites. Light soy sauce is used for seasoning; dark soy would change colour and intensity.
Bring the steamer to steady steam before adding the fish on a heatproof plate. Keep the lid closed during the main cooking stage and check 63°C or opaque, readily flaking flesh. Apply the prepared sauce and hot oil carefully as directed.
Dry fish has usually steamed too long. Excess cooking liquid can dilute the dressing; handle it according to the method before finishing. Stand clear when pouring hot oil over moist aromatics because it can spit.
Cantonese-style steamed fish highlights the fish itself with ginger, spring onion and a light soy dressing. Steaming should leave the flesh moist and delicate. The hot-oil finish releases aroma from the fresh garnish without turning it into a heavy fried topping.
1. Read firstRead every step once before switching on the cooker.
2. MeasureWeigh and prepare all ingredients in the order listed.
3. Control heatLow means a gentle bubble, medium cooks steadily, and high is for quick browning.
4. Check donenessUse the texture, timing and safe-temperature checks written in the method.
Complete one numbered step before moving to the next. Keep the heat and timing exactly as written.
Use equal-thickness portions so the edges do not dry before the centre cooks. Check steamer water during cooking without letting the pan boil dry.
Ingredient choices: Use fillet portions of similar thickness and check for pin bones. Cut ginger into fine matchsticks so it flavours the fish without large fibrous bites. Light soy sauce is used for seasoning; dark soy would change colour and intensity.
Cooking control: Bring the steamer to steady steam before adding the fish on a heatproof plate. Keep the lid closed during the main cooking stage and check 63°C or opaque, readily flaking flesh. Apply the prepared sauce and hot oil carefully as directed.
If something goes wrong: Dry fish has usually steamed too long. Excess cooking liquid can dilute the dressing; handle it according to the method before finishing. Stand clear when pouring hot oil over moist aromatics because it can spit.
Keep raw fish refrigerated and check for bones. Cook fish to at least 63°C in the thickest part. Keep raw-fish tools separate from ready-to-eat garnishes.
Serve immediately on the warmed cooking or serving plate with plain rice separately. Spoon the aromatic liquid over each portion without drowning it.
Refrigerate promptly in shallow covered containers at 4°C or below and use within 3 days. Reheat only the portion needed to at least 74°C throughout. Discard food left unrefrigerated for more than 2 hours, or 1 hour above 32°C.
Botanical
Vegetable spring rolls enclose a finely cut, relatively dry vegetable filling in crisp wrappers. The filling is cooked before rolling, so the frying stage…
 Botanical
This vegan mapo-style tofu uses finely chopped mushrooms for savoury depth in a chilli-bean sauce. Sichuan pepper supplies a tingling finish, while tofu contributes…
 Botanical
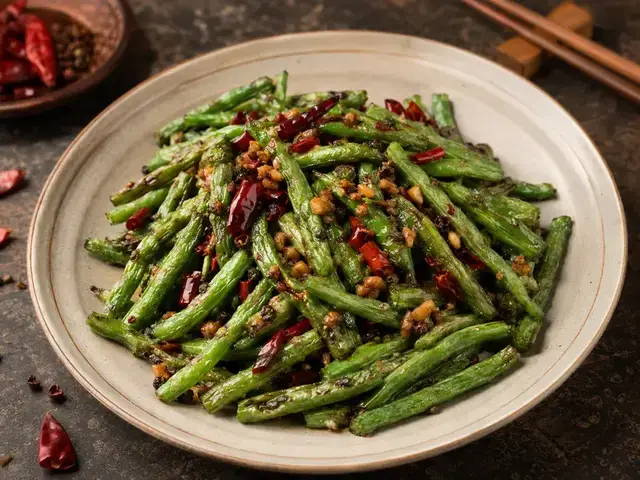
These Sichuan-style green beans have blistered surfaces and tender centres, with garlic, chilli and a little tingling pepper. The cooking method concentrates bean flavour…
No reviews yet. Be the first to rate this recipe.